Create your own personalized “Wreck This Journal”

Personalized "Wreck This Journal" ideas & inspiration at SuperflashCreative.wordpress.com

Have you heard of Wreck This Journal?  It’s a super awesome book by Keri Smith – on each page, there is a different prompt to “wreck” the page, and by the time you finish all the pages (which could take anywhere from a month to years, depending on how dedicated you are to it), your book will look *nothing* like it did when you bought it fresh from the store!  My friend Amber introduced me to the book – she bought a full sized one and showed it to me over coffee one day… a few days later, I went out and bought myself the pocket sized travel journal (called Wreck This Journal Everywhere) for my trip to Newfoundland.

One day, Amber was upset because she spilled a full cup of tea all over her journal (and even though it’s called “wreck” this journal, I can definitely empathize with not wanting to actually destroy the entire thing).  So,  I decided to make her a personalized journal, to cheer her up.

The first thing I did was go out and buy a plain notebook – I found a set of 3 hardcover, pocket sized notebooks with a plain white cover and plain white paper inside in the dollar section at Target, and they seemed perfect for the task at hand!  I made the cover using coordinating scrapbook paper, and included a little pocket, with a matching bookmark that slid right inside.

Personalized "Wreck This Journal" ideas & inspiration at SuperflashCreative.wordpress.com

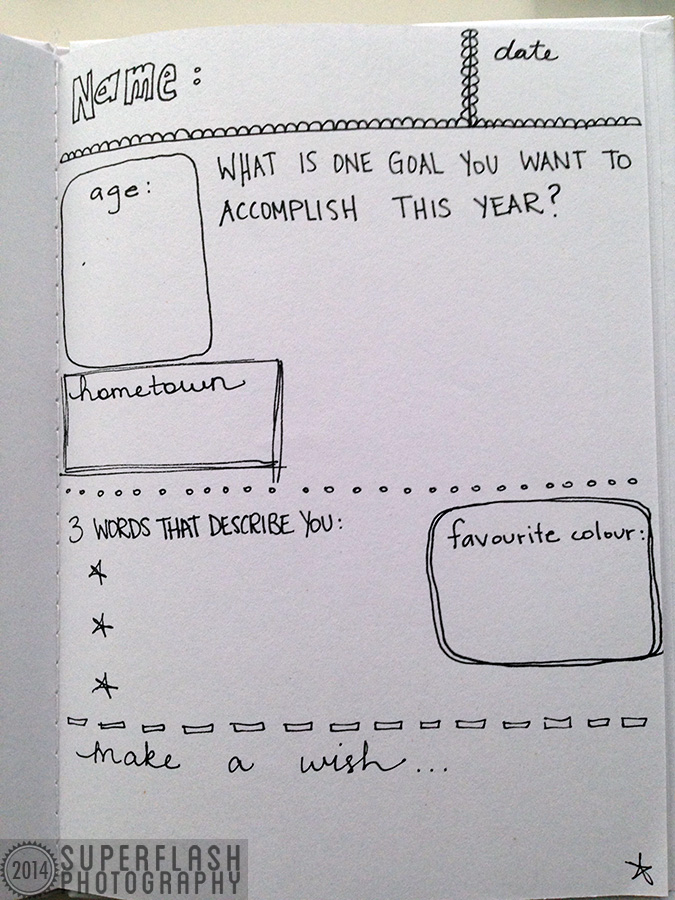
The next thing I did was to think up different page ideas and ways for Amber to wreck her new journal.  In the exact middle of the book, I created an “about me” page:

Personalized "Wreck This Journal" ideas & inspiration at SuperflashCreative.wordpress.com


I created different instructions for every page.  Some involved interaction with other people (there’s an “autograph” page and a page where she will have a friend write her a letter), some involved interaction with the environment (think leaf rubbings, gluing in random objects found on your journeys, etc) – but I tried to keep most pages focussed around things that really reminded me of Amber.  One of Amber’s favourite things in the world (and one of my favourite things about her) is her love of music… so of course, there were a few music-oriented pages in her personalized Wreck This Journal:

Personalized "Wreck This Journal" ideas & inspiration at SuperflashCreative.wordpress.com

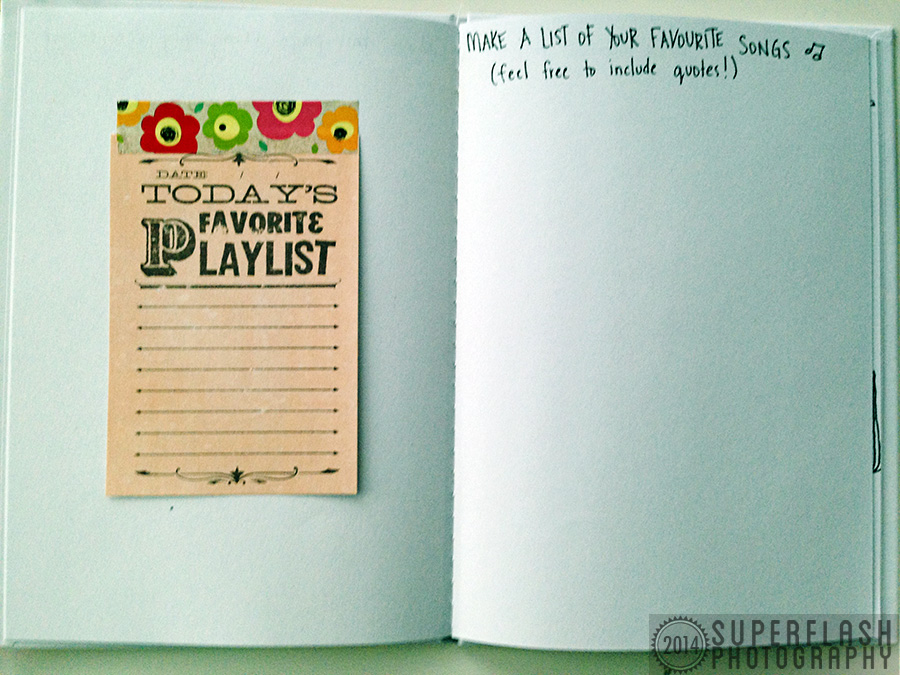
I used some journal prompt cards from my craft stash (these ones came from a K & Company Smash Pad) and taped them in using washi tape in coordinating colours.  Not all the pages had something taped on the opposite side though, because I wanted to leave some space for doodling and answering the prompts.  I also only taped the top down, so that they can be flipped up and doodled under, if desired.

Personalized "Wreck This Journal" ideas & inspiration at SuperflashCreative.wordpress.com


Creating your own wreck this journal is a super fun process, because you can make it really specific to yourself (or your friend!).  Are you a foodie?  Create food-inspired prompts, like listing a random set of ingredients and making a recipe out of them.  Are you into sci-fi?  Create a page where you doodle a monster from space.  The possibilities are endless!

I do think it’s way more fun to create a journal for a friend (and have them create one for you!) because then the prompts come from someone else and they’re more unexpected!  It’s also a great idea for a quick gift for a birthday, or any day, present.  Will you create one?  What are some of your ideas?

Creative Kiddie Crafts – Superhero Costume

My nephew is about to turn two, and he has one of the biggest imaginations I’ve ever seen in a kid his age.  Last year, his obsession was with monsters/Monsters Inc.  This year, he is all about the superheros.  Spider Man and Batman are his favourites, but he kept telling my sister that he needed an “ornange” (aka orange) shirt so that he could be “Super Matthew” – and a birthday idea was born!

supermatthewlogo

I started by designing a “Super Matthew” logo in Adobe Illustrator. The colours were more just a guideline of what it “could” look like.

I ended up going shopping for fabric after creating the logo, and I found some cool orange and mint-green/turquoise based prints that I loved so much! I also dug deep into my mom’s old fabric stash and found some vintage options that were super cool. The vision was definitely coming together in my head.

Now, keep in mind, I don’t really fancy myself a sewer, so this was a bit of a challenge for me.

supermatthewmask 
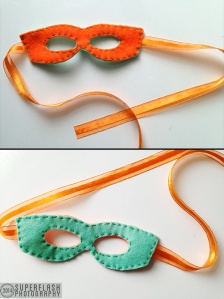
I decided to start with what I thought would be the easiest part of the costume – the mask.

I picked out my orange and mint green felt, some matching embroidery floss and ribbon and went to town on making a reversible mask.

I based my work on this tutorial over at slowmama.com that I came across on Pinterest. I didn’t follow it exactly, but I *really* loved the tip about using packing tape to affix the mask to the felt when cutting the pattern – that worked so much better for me than pins!


supermatthew_mThe next step was to begin turning the logo I made in Illustrator into a textile version with fabric. This was a bit more challenging than I anticipated, because in graphic design, there are all kinds of tools to help you make straight, precise lines. With fabric, not so much.

I created two versions of the “M” – one for a cape, and one for a t-shirt. They definitely had a bit of a “handmade charm,” but they were pretty good, I thought!  I used fabric glue, rather than sewing the pieces together.
supermatthew_giftI created the cape using this tutorial from The Southern Institute.  It was pretty easy to follow – all I did was buy a large men’s t-shirt, cut off the arms and front, add a velcro closure to the neck, and glue on my logo.  Voila – instant cape!

For the wrist cuffs, I just free-handed them using felt, and stitched on a little M.

And for the t-shirt, I found a shirt that was one size too big for my nephew (so he could wear it for a while) and glued the logo on.  I folded them all up, wrapped them in some blue tissue paper and set them into a reusable box.

supermatthew_card Finally, I created a card using various matching papers and washi tape, carrying through the “Super Matthew” theme.

I also included a Spiderman board book, and an Incredibles book – both of which he was more interested in when he opened up his present!  Oops.  I think my family was more excited about the present than my nephew was… UNTIL my niece decided to put his cape on herself, and he realized exactly what it was that was in his present.  Then, he immediately wanted to put the cape (and the shirt) on, and he ran around the house yelling “FLY!!!” … it was just about the cutest thing I’ve ever seen!


Free Printable: Chalkboard Easter Tags


It’s almost Easter and that has me thinking about Easter baskets!  Every good basket needs a tag, so I’ve created these printable chalkboard tags for you to download and share with all the little bunnies in your life! Simply download the high resolution PDF file, print, punch, tie and go!Free Printable Easter Tags from Superflash Creative


To download the PDF file, click HERE and hit “save as”.

Supplies needed:

  • printer
  • cardstock
  • scissors
  • ribbon or double-sided tape

Instructions:

1. For best results, print on heavy cardstock.  Print and carefully cut along the edges of each tag.

2. Use the tags by either punching through a corner and attaching with ribbon, or attaching to a treat bag with double-sided tape.  Use the tags to embellish Easter baskets, candy jars, treat bags or any other gift you’re giving this Easter – Enjoy!

Glitzy Glam Halloween Wreath

Glitzy Glam Halloween Wreath by Superflash Creative

For Halloween this year, I decided to create a wreath for our front door. But I didn’t want to do the traditional orange and black – instead I opted for something a little more glamorous. That’s how I came up with the Glitzy Glam Halloween Wreath. It was also important to me that I didn’t spend too much time or money on it – all of the products used to create the wreath were bought at either Dollar Tree or at Michael’s just last week when they had a sale on Halloween items (I also enjoy shopping the week after Halloween for great discounts on products for next year!). Time wise, it only took me about an hour or two to create the wreath.

The supplies I used were:
– aluminum wire, bent into circles
– thinner jewellery wire
– glue gun
– 4 silver & black skull garlands (Dollar Tree)
– 1 magenta & black bat garland (Dollar Tree)
– 1 wired silver skull garland (Dollar Tree)
– 1 black sparkly LED foam skull (Dollar Tree)
– 1 bunch of black roses with spiders (Dollar Tree)
– 28″ of black sparkly ribbon (Michael’s)
– 1 magenta floral spray (Michael’s)

Note: if you need a bigger view of the process shots, just click on the photo!

Glitzy Glam Halloween Wreath by Superflash Creative - Wire Frame  Step 1: Arrange aluminum wire into circle forms. Mine measured at 14″ diameter for the outside circle and 10.5″ diameter for the inside circle. Attach the two with wire “joints” – it doesn’t have to be too sturdy, since the garland will wrap around the forms. Just enough to keep them centered and spaced out while you work. Now, I used the aluminum circles because I happened to have the wire on hand – if you prefer, you can use a wreath form, pool noodle, or anything else that forms a circle!
Glitzy Glam Halloween Wreath by Superflash Creative - Wrapping Garland  Step 2: Once your circles are formed, you can begin wrapping your garland around the form.  I used about 1 length of garland per quarter of the wreath, for 4 garlands in total.  When I started, and came to the end, I used a drop of warm glue (I didn’t use the hot setting for fear of melting the plastic) to secure the garland to the wreath form.
Glitzy Glam Halloween Wreath by Superflash Creative - Garland  Step 3: After the black & silver skull garland was in place, I used one length of the black & magenta bat garland as an accent.  I wrapped it around loosely, just to give the wreath a bit of colour.
Glitzy Glam Halloween Wreath by Superflash Creative - wrapping wire garland  Step 4: To give the wreath a bit of dimension, I cut small (about 5-10″) lengths of the wired skull garland that I wanted to stick out from the wreath. To secure the wired garland, I simply moved aside a bit of the fluffy garland (in an area where it was not glued down) and wrapped the wire around the aluminum frame. Then once it was secure, I took the end that was sticking out of the wreath and twirled it around my finger to create a little curl.
Glitzy Glam Halloween Wreath by Superflash Creative - Ribbon  Step 5: At this point, the wreath should be taking a pretty good shape, and looking almost like the final product! This is a good time to cut your length of ribbon (I used about 28″ to hang it on my door from a screw – some people like to cut a super long ribbon and hang it from an upside down hook on the inside of the door – like this – but I prefer the inside of my door to be clean and free – either way, it’s your choice!)
Glitzy Glam Halloween Wreath by Superflash Creative - embellishments  Step 6: Now that you know where the top & centre of your wreath is, you can add your embellishments! I used a magenta floral spray that I got for 50 cents at Michael’s, one black rose at the bottom corner and a spider from the same arrangement at the top left of the wreath, and a foam sparkly skull with a control on the back to give it LED lit-up eyes).  I used low-temp glue from the glue gun to set them all in place.

And… voila! Here is the final product, hanging on my door & ready for trick-or-treaters! If you have any questions about any steps in the process, please leave them in the comments. And if you make a wreath like this one, please link it up! I’d love to see it!  (As always – all link party linkups are on the “connect” page!)
Glitzy Glam Halloween Wreath by Superflash Creative - Final Product!

Craft Night Party!

Superflash Creative Craft Party To celebrate my new crafting space, I decided to throw a small crafting get together with some coworkers.  As it turned out, “small” turned out to be super small, and it was just myself and one other due to a few different unplanned circumstances… but sometimes those are the best kinds of parties!

Superflash Creative Craft Party - Fruit Infused Water When I started thinking about the party, I began thinking about my menu.  The party was planned to take place after work on a Friday night, and there were some dietary concerns to consider too.  I eat primal, and my coworkers are vegetarian and vegan.  There is a bit of overlap between the food needs – the best of which is that they are all focused on natural, healthy foods.  Since it was a craft party, I thought about colour, and I decided the best foods I could possibly serve were fruits and vegetables!  They’re colourful, and they’re primal, vegan, and vegetarian friendly – how could I go wrong?

So, my menu consisted of:

    • a platter of fresh berries & grapes, and some green apple slices.  I whipped up a vegetarian/primal friendly dip out of Greek yogurt, maple syrup, vanilla and cinnamon, and a caramel dip made of dates, vanilla, almond milk and water that is friendly to all three diets.

Superflash Creative Craft Party - Cucumber Tomato Salad

  • A fresh cucumber and tomato salad.  This has always been a summer staple in my Italian family, and it is delicious.  It’s just diced (fresh – not canned) tomatoes, cucumber, fresh basil,  onions and then a dressing made up of olive oil, salt, pepper and garlic powder.  Yum.
  • Not pictured, but I also popped some natural popcorn.  Popcorn is one of those things that isn’t really paleo-friendly, but I have to admit, I did cheat a little.  It’s hard to resist!
  • For beverages, we had a giant glass jar with fruit-infused water, and two glorious bottles of wine that my coworker, Cheryl, brought (no, we didn’t go through both!)

Of course, I added little labels beside each item so that everyone was able to identify what they wanted/were able to eat.

Superflash Creative Craft Party - Fruit & dips

Superflash Creative Craft Party  - Craft Room

Superflash Creative Craft Party - Bottle Cap Magnets

When it came to the crafting portion of the evening, I wanted to pick things that would be easy for everyone to create, but also things that would turn out nice and would be fun to display.  Bottle Cap magnets were the first thing that came to mind, because they’re quick, easy, fairly trendy right now, and they turn out great.

I happen to save bottle caps every time I drink anything from a glass bottle – and since the centrepieces at my wedding were made of glass coke bottles… I happened to have a lot of bottle caps!  We started by using one-inch circle punches to cut out our images.  I used an vintage magazine to cut out a cute little couple, and some old sheet music for mine.  Cheryl made hers out of a business card.  I added a bit of embellishment, with glitter, rhinestones and beads.  Then we used Mod Podge’s Dimensional Magic to seal them in place.
Superflash Creative Craft Party - crafts & wine

While we let our magnets dry a bit, we watched a bit of Orange Is The New Black and then began crafting up some cards.   Cheryl made a beautiful “I Love You” card for her man, while I created a little something to mail up to my nephew for his first birthday.  We decided to make use of some of my tools and toys, and picked out some stamps, ink, and embossing powder.   I’m not sure if you can tell in the pictures, but in my card, the word “one” is embossed in red, and in Cheryl’s, the butterfly is embossed with a lovely clear embossing powder, on top of turquoise ink.  Her card turned out really great!

Superflash Creative Craft Party - Card & Magnets Superflash Creative Craft Party - card

In the end, it turned out to be a super fun night of wine and art!  We both had a blast, and came away with a few fun things to display and share.  To recap, here are some of my tips for throwing a craft party:

  1. Take into consideration other people’s diets, and plan accordingly.  There is bound to be something for everyone, even if it takes a bit of creative planning.
  2. Lay some butcher paper over your surfaces.  It serves as scrap paper, if you want to test out a colour before using it on your project, and it makes for easy cleanup the next day!
  3. If you know how to use something that’s unique and interesting – teach others the technique too!

Superflash Creative Craft Party - Creating!

Have you ever thrown a craft party?  What are your best tips?

Life’s A Beach!

Life's A Beach, Superflash Creative, party, printables, pink, yellow, turquoise, etsy, bunting, For her 7th birthday, my niece requested a Beach Party theme, with bright pink, turquoise and yellow being the main colours.  Since I was planning a trip to Toronto that coincided with her birthday, I created the printables here in Florida, but also got to set up the party while I was visiting!  The Life’s A Beach party sprang into motion – you can pick up the printables for yourself over at the Superflash Creative Etsy Page.

The palate was super bright and colourful and it was really fun to come up with a design.  I chose the stripes to be somewhat reminiscent of a beach towel, and all the icons were of a beach theme, like sunglasses, flip flops, sandcastles, star fish and more.

Life's A Beach Party, photobooth, bunting, printables, Superflash Creative, beach, We only needed a short bunting for our party (you’ll see it in the photo booth!), but if you need a longer one, you can print out more pages and keep stringing!
Speaking of the photo booth – it was definitely the hit of the party! 7-year-olds really love starring in photos!

We set it up outside, on a screened in porch.  We nailed a plain white sheet to the wall, and then used an old fishing net and the bunting to decorate it.  We placed a sturdy crate on the floor and the sheet was long enough to cover it – this was ideal because some of the shorter girls were able to step up, and still have the bunting and fishing net in the background.  To the left, we set up a little Ikea table with a basket full of props.  (By the way – the moustache and giant dollar store elvis glasses were definitely the favourites at the party!)

Life's A Beach Party, Superflash Creative Life's A Beach Party, Superflash Creative Life's A Beach Party, Superflash Creative

Girls love their crafts!  For “entertainment” at the party, we came up with some beach-themed crafts.  It started with the paint a sea shell station, which was set up outside beside the photo booth.  The girls really loved this – some had never even seen a sea shell before! Some of the girls painted 4 or 5 shells themselves!

Life's A Beach Party, Superflash Creative Next, they moved on to the decorate a palm tree station – and it’s hard to say which craft they loved more!  We set out lots of tools for them to decorate with – from small pieces of paper that they could make a mosaic with, to glitter, sequins, gems, fancy scissors, markers, oil pastels and more!

After the girls ate, they moved onto the create a friendship bracelet station, to try and wind them down a bit.  Having craft stations set up is great, because it gives them something to take home (besides the loot bag) that they actually made themselves.  The girls really loved doing all these crafts!

Life's A Beach Party, cupcakes, Superflash Creative, Life's A Beach Party, cookies, palm tree, Superflash Creative Life's A Beach Party, cupcake, Happy Birthday Nicole, Superflash Creative

Life's A Beach Party, cake, beachy bears, teddy grahams, candy, gummies, Superflash Creative What’s a party without sweet treats?!  For Nicole’s Life’s A Beach party, we made a cupcake tower, with super cute, coordinating cupcake picks, and found a palm tree shaped platter to display my sisters famous chocolate chip cookies!

My favourite part though, was the cake I got to decorate for her!  I don’t normally consider myself to be a cake decorator, but I saw this idea floating around the internet, and I really wanted to try it for myself.  I used brown sugar for the sand, and two shades of turquoise icing for the water.  A few teddy grahams and some dolphin and shark gummies rounded out the cake.  This was a complete surprise for Nicole (I decorated it while the girls were painting shells outside!) and she was thrilled.  This is an easy enough design for anyone to make, and a great addition to any beach party!

That’s it from the beach for now! Check out some more photos over at the Superflash Creative Facebook Page and printables from the party at Etsy.  Look out for super cute photobooth pictures coming soon!

Life's A Beach Party, Superflash Creative, girls, teddy bear, beach cake, cute, 7 years old,

Masquerade Ball party

Sweet table closeup masked cupcakes A fun idea for a party theme is a masquerade ball. I threw this one just before Halloween in 2011, and it was a blast. I chose a colour scheme of red, black, silver, gold and white, and guests were asked to come in fancy clothes and a mask. The sweet table was set up in a corner and included a candy buffet, and various cakes and cupcakes (not yet pictured at left, as this was taken pre-party), all fitting within the colour scheme.  The space was further decorated with black candelabras & bleeding candles, red and gold helium-filled balloons, and table cloths in red and white.

Wine Bottle candles & book shelf In order to transform the space and carry the theme throughout the location, decor elements were added to every place a guest would cast their eyes. The main table was set up with a white table cloth and red runner. Candle holders were made out of wine bottles (with more bleeding candles) – and the bookcase behind was adorned with some feather boas, skulls and creepy cheesecloth, along with some extra masks we picked up at the dollar store for decorative purposes – and also for any guests who forgot to bring a mask.

Alcohol bottles Over by the bar, I took some bottles that we bought at the dollar store and made our own paper labels for them.  I filled each up with a different type of alcohol or mix (tonic water, vodka, cranberry juice and rum, I believe) – and these were set up on display, so that guests could either serve themselves or be served with other drinks behind the bar.

Some of my favourite men To set up a photobooth, I chose a section of wall with nothing else going on. I draped a white sheet over a curtain rod, and added some black cheesecloth over top.   A camera was set up on a tripod, a few feet away.  This could either be triggered by a remote, or by someone stepping behind the camera to frame the shot.  A photobooth is such a fun addition to a party, because people will act differently in front of a camera, and you will get some excellent photos and memories of your party!


I posed the question on Facebook the other day and would love to continue the discussion: In your opinion, what is the most important part of a party? Please feel free to answer here, or over on facebook!

Paper Flower Bouquet

Paper Flower Bouquet I have always loved making 3D works with paper, and I’ve always loved the look of paper flowers, having previously decorated my condo with several vases full of them.  This bouquet took a lot of work, but it became a beautiful representation of me.

The bouquet consisted of about 24 different flowers, made out of different types of turquoise, red, black & white patterned and solid papers.  I also added pompoms, jewels, feathers and tufts of tulle throughout the bouquet, and fresh jasmine flowers as well.

Once I crafted each flower individually, I enlisted the help of my friend Kim who works as a florist by day, to help me create the shape and structure of the bouquet itself.  When it was put together the way I wanted it, we then wrapped the stem in satin ribbon and added a bit of bling.

It was a lot of hard work and dedication to create this bouquet but definitely worth it.

my bouquetworth the hard work